Connecting and Transferring Files with SmartFTP
Once SmartFTP is installed, you'll want to get started using it to transfer files. SmartFTP has made that super easy for you. To start transferring files, you only need to know how to use one thing: The Browser Windows.
Connecting With Browser Windows

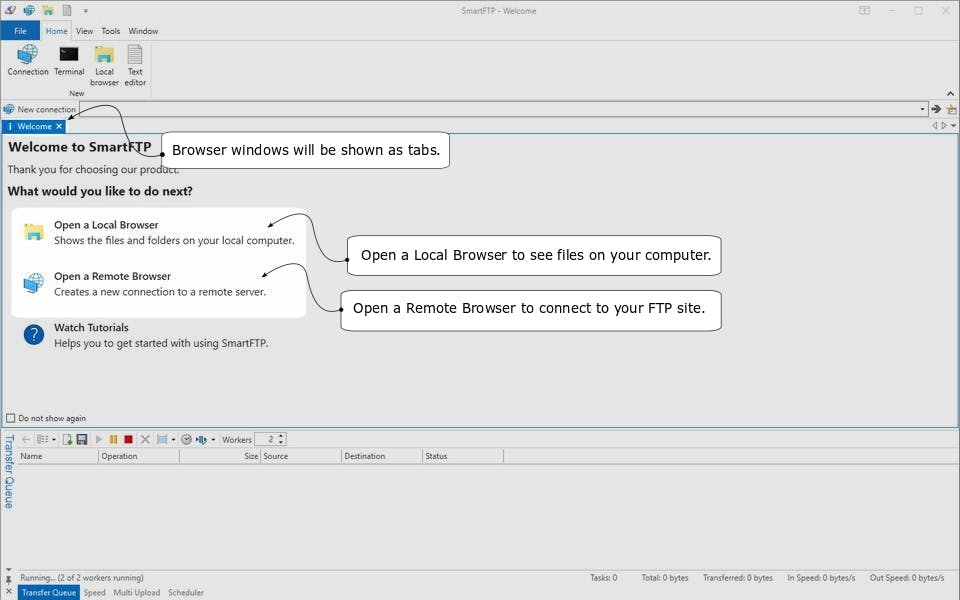
When you first connect with SmartFTP, you'll see a welcome message. In that window you can simply click on the 'Open a Local Browser' link.
- If you close the Welcome message, you can open a Local Browser window by clicking File Menu > New Local Browser.
- The Local Browser is your computer.
Next, you'll connect to your FTP account by opening a Remote Browser. You can click the Open a Remote Browser hyperlink in the Welcome screen, or you can click File menu > New Remote Browser Window.
- The Remote Browser is your FTP Server
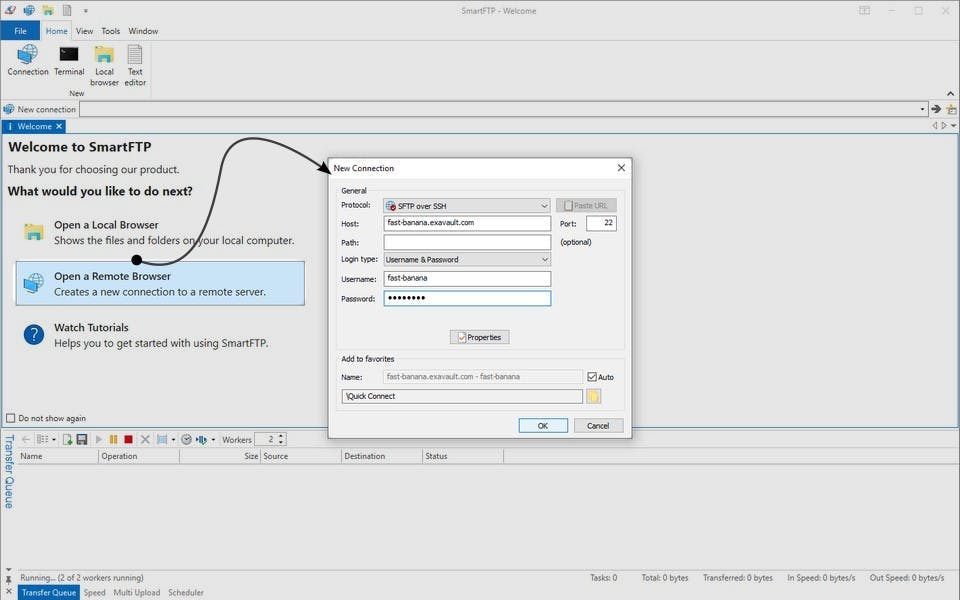
When you open a Remote browser, you will be prompted to enter in the details to connect to your FTP server into the New Remote Connection message box:
- Protocol: We suggest you use SFTP.
- Host: This is your FTP server address.
- Log in type: Username and Password.
- Username: Your FTP username.
- Password: The password for your FTP username.
After filling in those details, simply click the OK button. That's all there is to it.
Here is an example of the information you would enter into the New Remote Connection message box to connect to your ExaVault account:
- Protocol: We suggest you use FTP over SSH
- Host: fast-banana.exavault.com
- Log in type: Username and Password.
- Username: fast-banana
- Password: wouldn+-U-l1ke2N0!
If you would like to add this connection to your Favorites, just enter check the Auto ☑ box at the bottom of the New Remote Connection message box.
Using and Configuring the Browser Window
SmartFTP has lots of options. When you connect for the first time, you'll see all of the options enabled. Here are some suggestions to help you optimize the window so you can get down to business transferring files.
The Local Browser Window
Depending on how you opened the browser windows, the Local Browser window may appear on the left or the right-hand side of the SmartFTP window. The way to identify it is to look for:
- Use of backslash to separate folders (\)
- My Computer
- Local Disc (C:)
- My Documents
- C:\some folder name\
The Remote Browser Windows
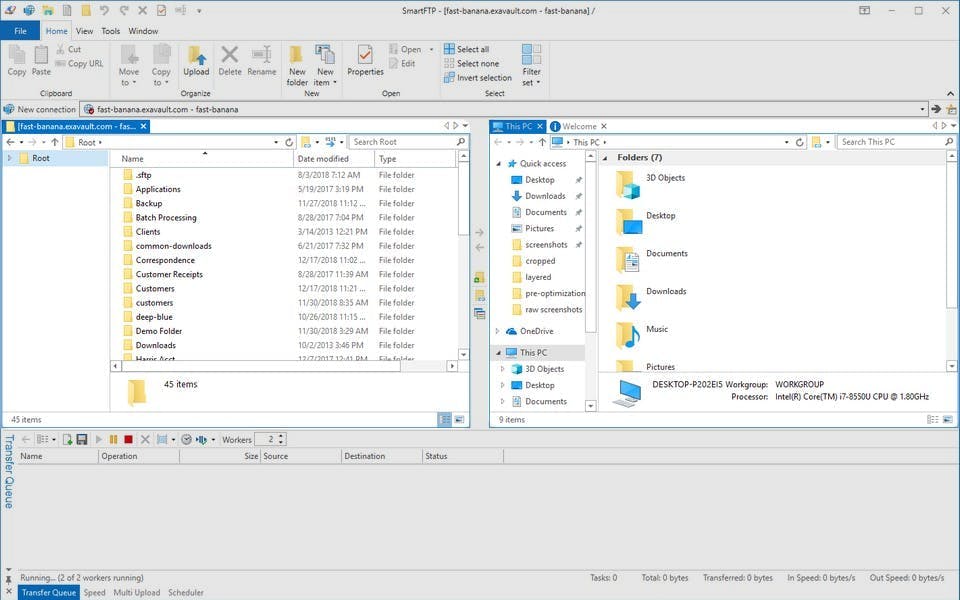
The Remote Browser window may be on either the left or the right-hand side of the window. To identify the Remote Browser, look for:
- Use of slash to separate folders (/)
- Your FTP server account name in a browser title tab
- A message log
Moving the Panes
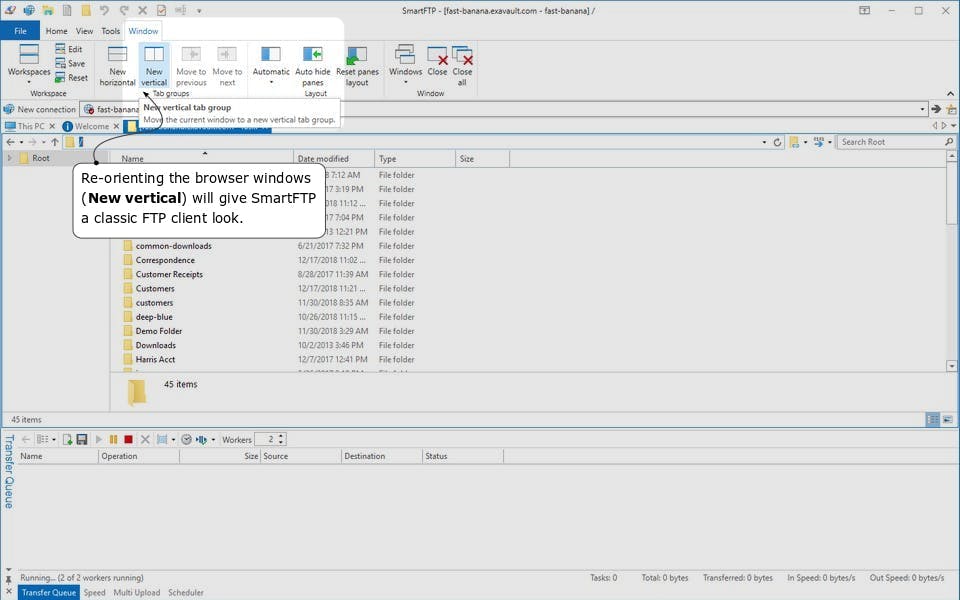
With SmartFTP, you can place the windows wherever you like. However, most FTP clients use the following positions:
- Your computer (the Local Browser in SmartFTP) is almost always on the left side.
- The FTP server (the Remote Browser in SmartFTP) is nearly universally on the right side.
If you'd like SmartFTP to follow these conventions:
- Click the Windows menu > New vertical
Transferring Files with the Browser Windows
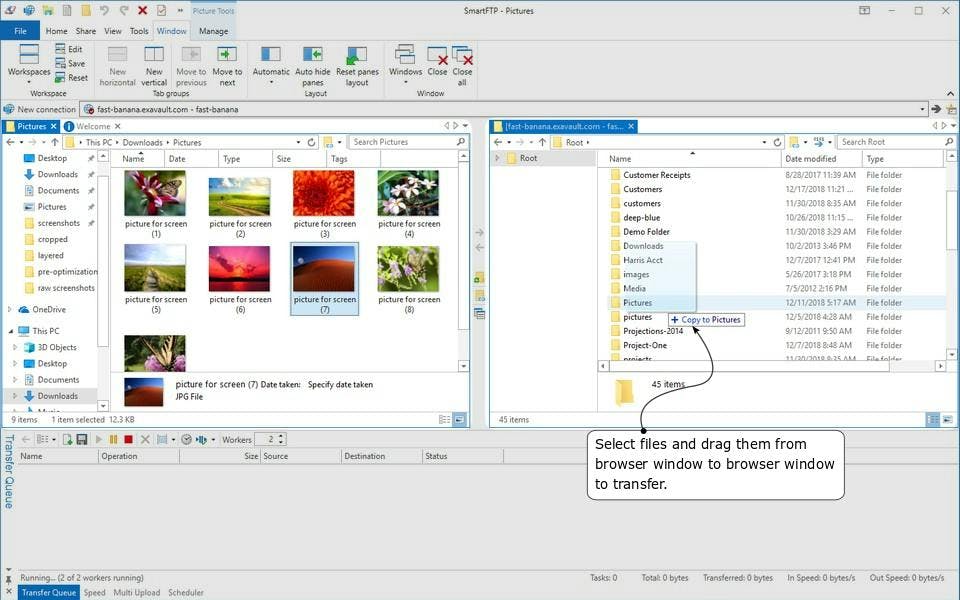
Transferring files with SmartFTP is pretty straight forward. Once you connect, you need only to select files in one browser and move them to another.
You can also transfer files by:
1. Selecting file(s) in either the Local Browser or Remote Browser
2. Clicking Commands menu >
- Upload (if selecting from the Local Browser).
- Download (if selecting from the Remote Browser).
If you'd like to select multiple files, you can use both block select and cherry-picking with SmartFTP.
Disconnecting From Your FTP Server
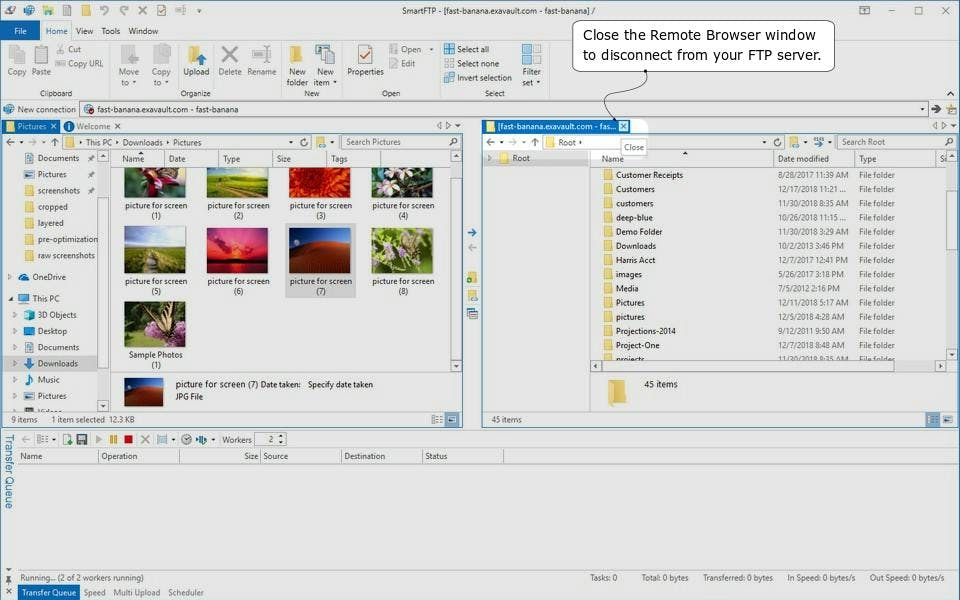
To disconnect from the FTP server you should close the Remote Browser window.
Table Of Contents
Support Library
Still Have Questions?
Email Us
Don't see the answer you need? Drop us a note, and our support team will email you back.
Send Email


