Installing FileZilla
FileZilla is one of the most popular desktop FTP clients in use today. In addition to being free and open source, it is easy to use and configure. There are versions available for Microsoft Windows, Mac OS, and Linux.
FileZilla can be downloaded from the FileZilla project page . The official installation documentation for FileZilla can also be found on the FileZilla project page.
Installation: Microsoft Windows

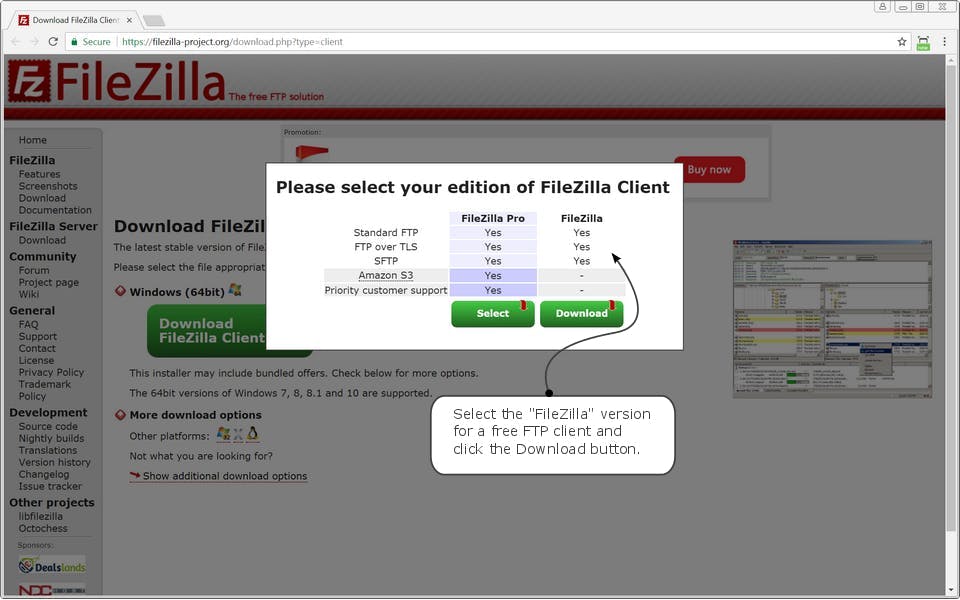
1. Download the desired edition of the FileZilla client. For use with ExaVault, the standard (free!) version of the client will have all the features you need.
2. Double-click the downloaded file.
3. Follow the installation prompts. Use the default options for installation.
Installation: Mac OS X

1. Download the desired edition of the FileZilla client. For use with ExaVault, the standard (free!) version of the client will have all the features you need.
2. Double-click the downloaded FileZilla-installer file to start the installation process.
3. Follow the installation prompts. Use the default options for installation
Installation: Linux, *nix
FileZilla has been ported to many packaging systems. You should use the appropriate package for your distribution:
- Ubuntu and Debian can install with apt-get at terminal:
sudo apt-get install filezilla
- BSD, other *nix:
- Download the b-zipped source tarball from the FileZilla project page.
- Review the dependencies.
- At terminal, extract the downloaded tarball:
tar -jxvf FileZilla_[version]_src.tar.bz2
- Change into the extracted directory, configure and run make:
cd FileZilla[version]

./configure

make
- Login as Super User (alternatively,sudo) and compile:
make install
Support Library
Still Have Questions?
Email Us
Don't see the answer you need? Drop us a note, and our support team will email you back.
Send Email


