Communication Settings
Communication Settings can only be accessed by users with admin permissions. If you do not have admin permissions and need to update account settings, contact your system administrator.

You are able to control system-wide messaging settings from the Communication tab in the Preferences section of the My Account page.
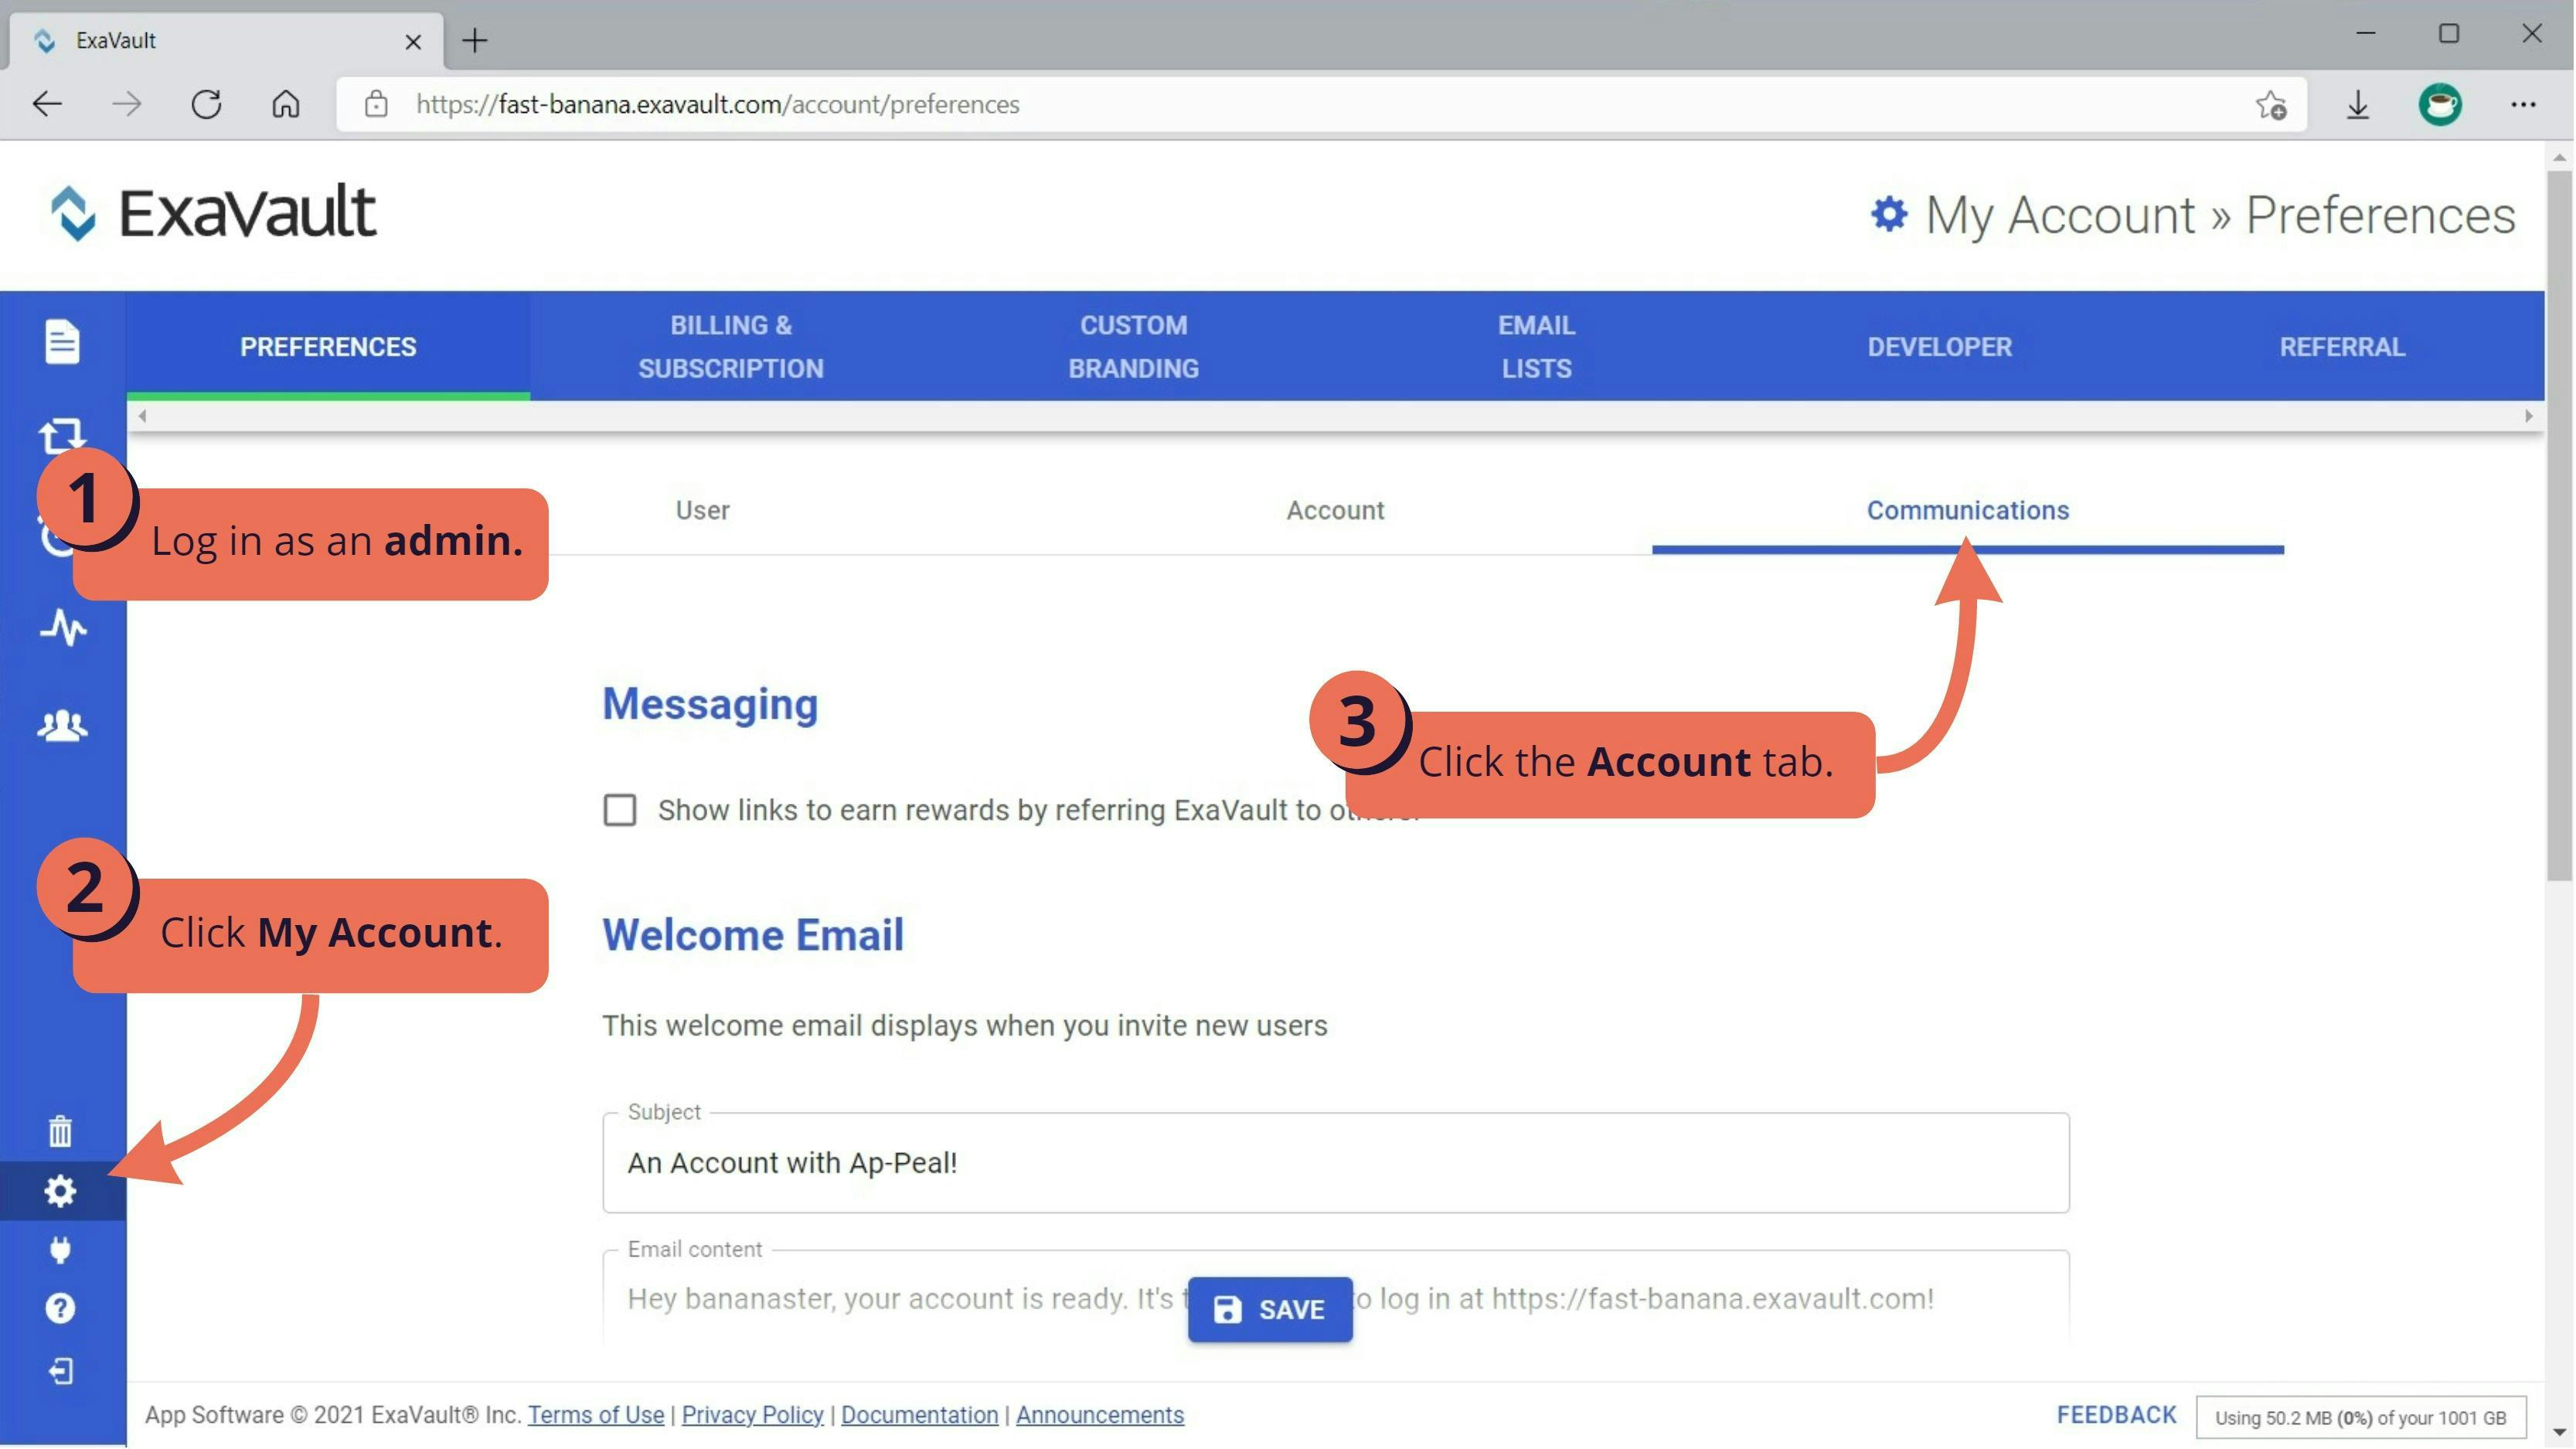
To access communication settings for your account:
1. Log in to your ExaVault account as an admin.
2. Click on the My Account (gear icon) option from the left navigation bar.
3. Click on the Communication tab on the Preferences page.
Messaging
The Show links to earn rewards by referring ExaVault to others option will display or remove the referral link at the bottom of each page in file manager. This setting affects all users on the account.
Check to enable (uncheck to disable) and click SAVE to update.
Welcome Email
This Welcome Email settings allows you to select the messaging for the email sent to new users. The Welcome Email can be reset when editing a user. Changes to this setting apply to the entire account.

To updating your Welcome Email
1. Log in to your ExaVault account as an admin.
2. Click on the My Account (gear icon) option from the left navigation bar.
3. Click on the Communication tab on the Preferences page.
4. Update the Subject and Email content fields to have your custom messaging.
5. Add any variables into your message to provide specific information to your users. The variables are entered with two open and close brackets. When the email is sent, the variable will be replaced with account specific information. More information below.
6. Click SAVE.
Using Variables
When you add a variable to your message, the text will be replaced with account specific information.
- [[username]]: adds bold text of the user who is receiving the welcome email.
- [[ftpserver]]: adds a link to your account storage.
- [[setpassword]]: adds a link to either reset password or log in (pending user permissions).
Custom Email Signature
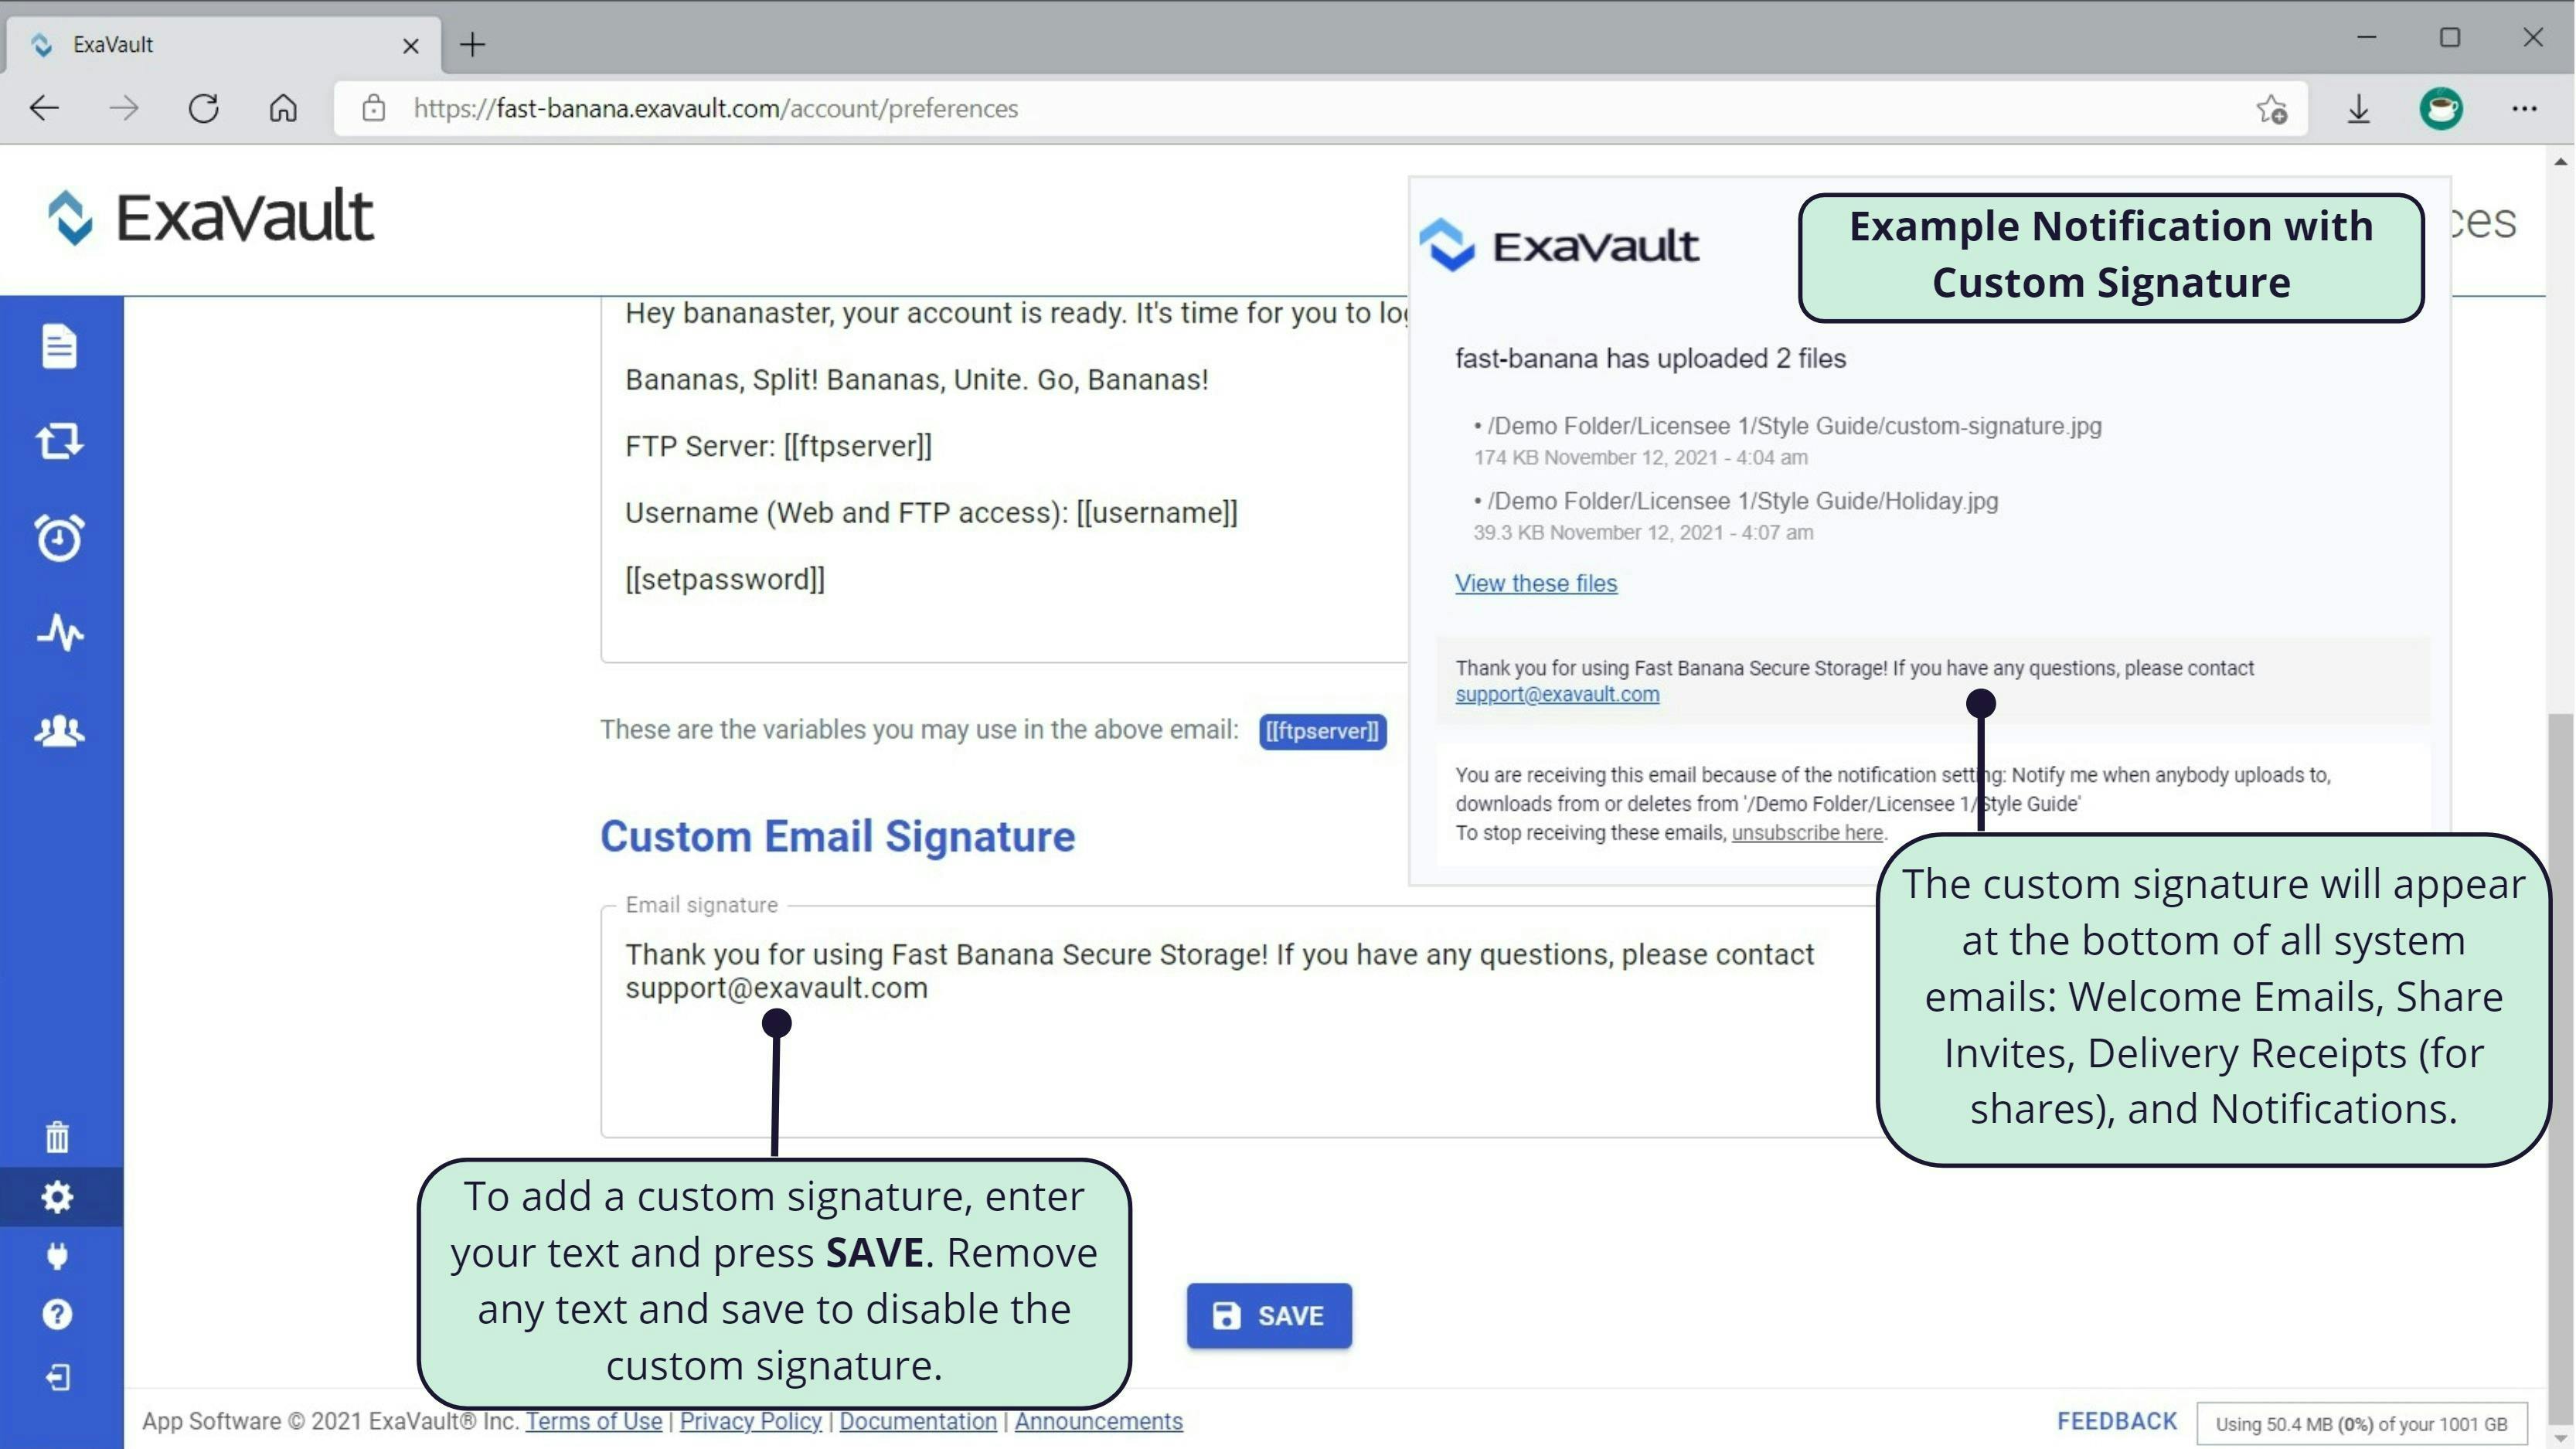
Your custom email signature will appear at the bottom of all system emails. This includes:
- Welcome Emails
- Share Invites
- Delivery Receipts (for shares)
- Notifications
Variables are not available in the custom email signature.
Table Of Contents
Support Library
Still Have Questions?
Email Us
Don't see the answer you need? Drop us a note, and our support team will email you back.
Send Email


