
Web Application Usability Tidbits
Showcasing a few of the minor UI updates that provide a better experience in the web application. Read More
The option to restore files is a feature that’s been a popular request for a while, and we’re happy to be able to deliver. When we first got started, we knew it would take some time to build but initially underestimated the design complexity of providing an undelete feature.
Our original plan was to add a new page that would show all the files that had been recently deleted by a user, with an option to restore the file. Simple, right?
Almost immediately, we realized that wouldn’t work without some big changes. Our directory is centered around the idea of a “home folder,” which we had to decide how to represent in deleted files. What happens if you delete a file located two directories below the home, but the directories themselves are intact?
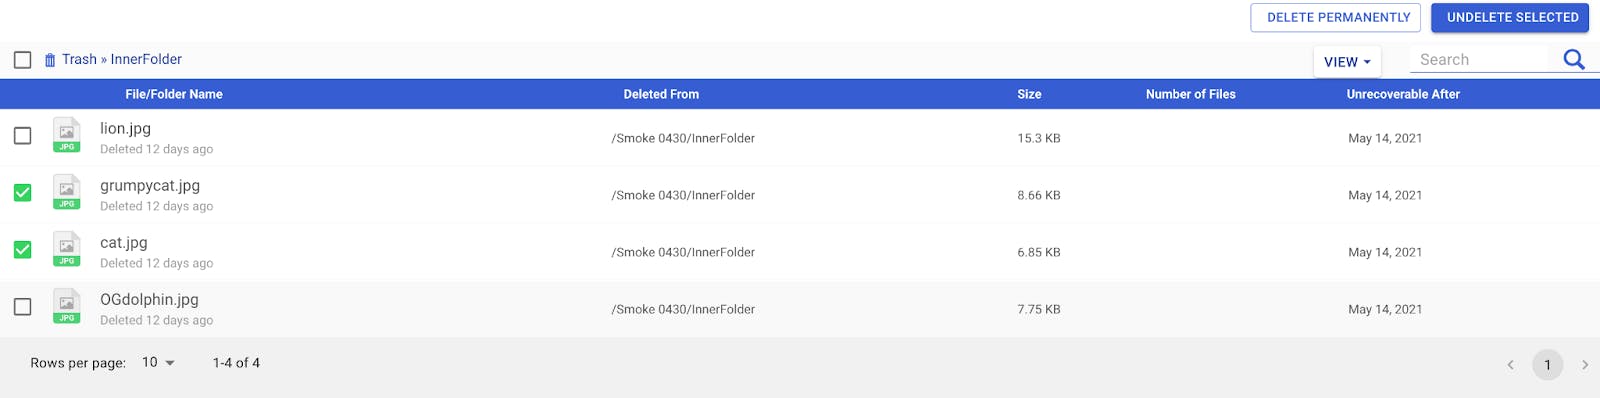
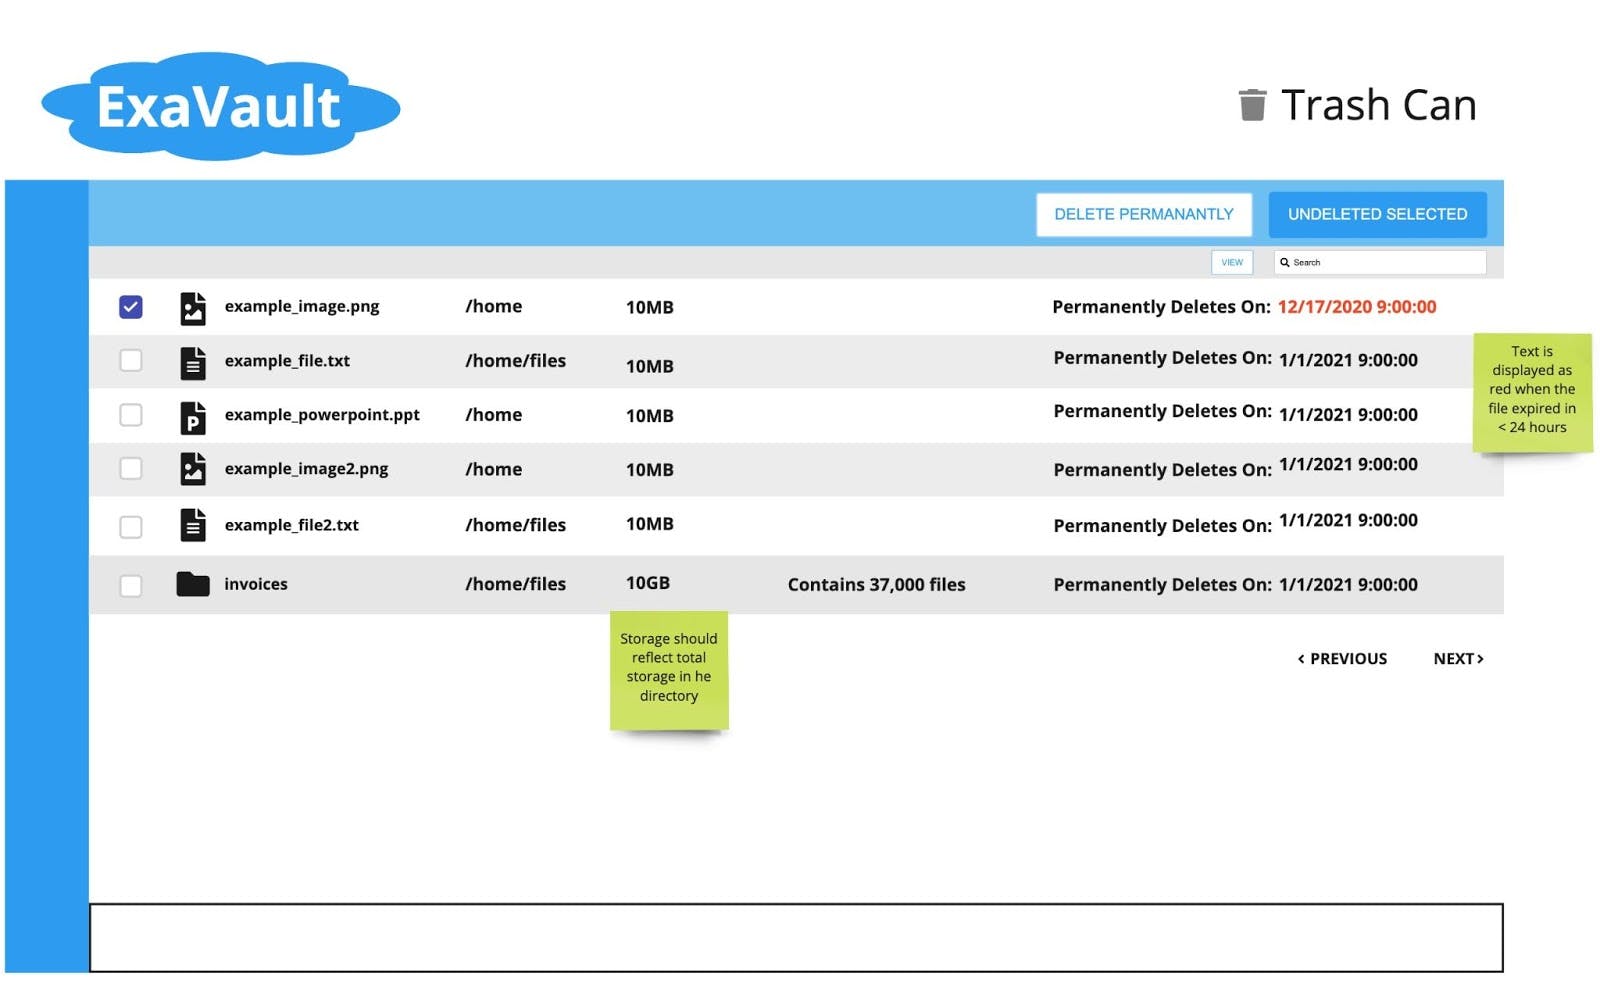
After a few mockups and conversations, we ended up with a rootless structure to the Trash Can. Deleted files will all go into the trash without a parent directory. The only exception to this rule is if a directory is deleted. We were able to keep the structure of the directory to make undeleting large amounts of data easy.
Designing the rootless structure while making the Trash Can much more functional created a new puzzle to solve; where to put files being restored?
While we preserve directory information on deleted items, directories can be changed, moved, or deleted a couple of days later. One of the primary goals when we began this project, was simplicity. Making sure you could come in, find your files and restore, in just moments.
We did consider adding more situational complexity based on the current state of the directory. Still, we were concerned about the overhead we’d be asking of our customers. Asking them to understand the state of all directories at all times as well as different workflows for restoring files.
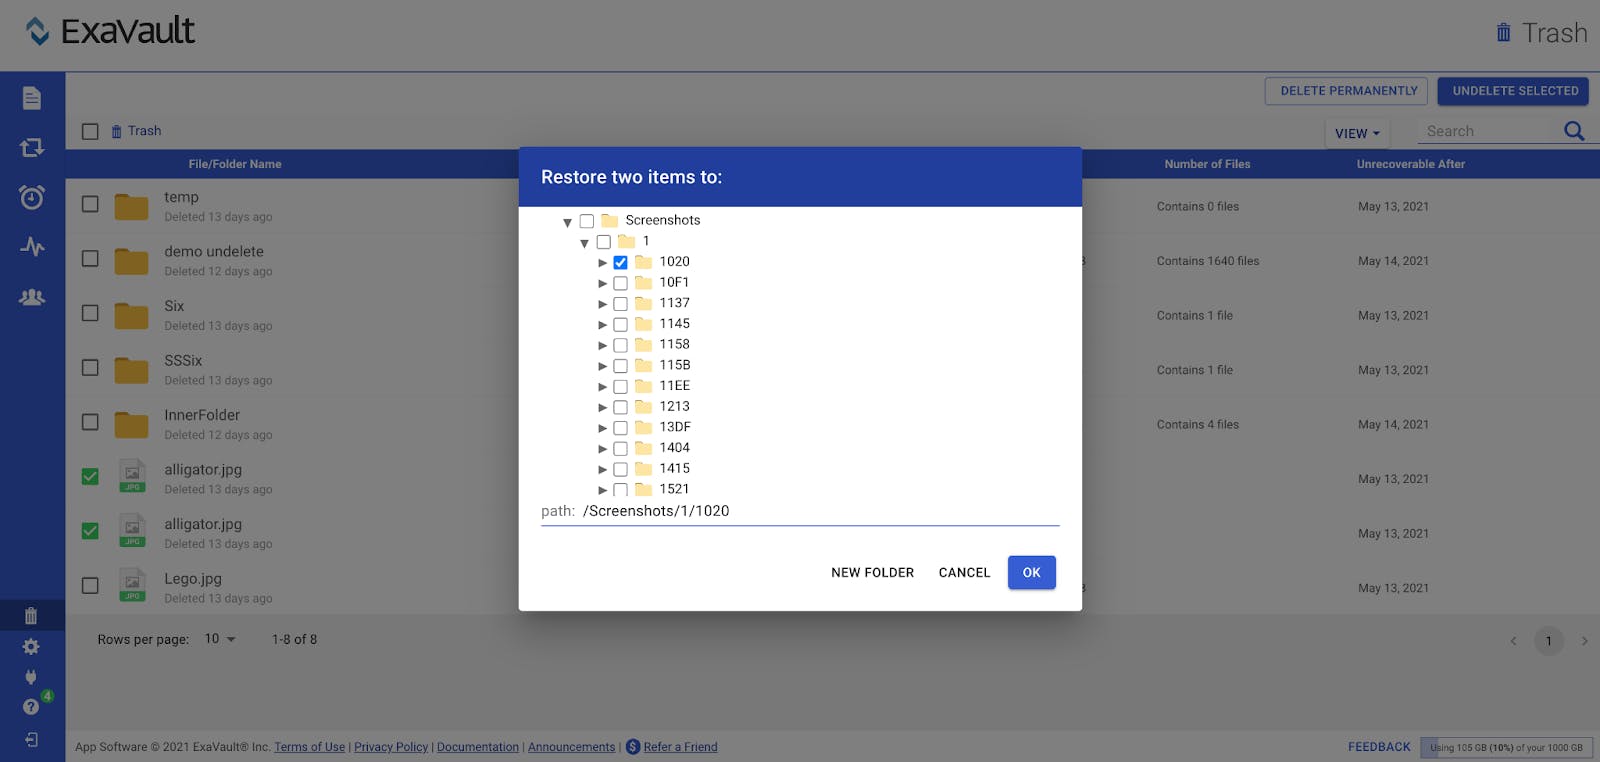
We opted to make a single workflow where you select the directory location to place undeleted resources. Choosing the directory when undeleting allowed us to provide simplicity and a reliable experience, arguably at the expense of “smarter” workflows in certain scenarios.
Approaching the end of the project, it came down to one last major piece— some exception handling and messaging. As you may expect, file names in your account do have to be unique within their directory.
However, it’d be a little stranger if your deleted files stopped you from naming your files what you want. Duplicate file names created a case where you could attempt to restore a file that had been replaced by a file of the same name, creating an interesting loop of restoring and deleting files.
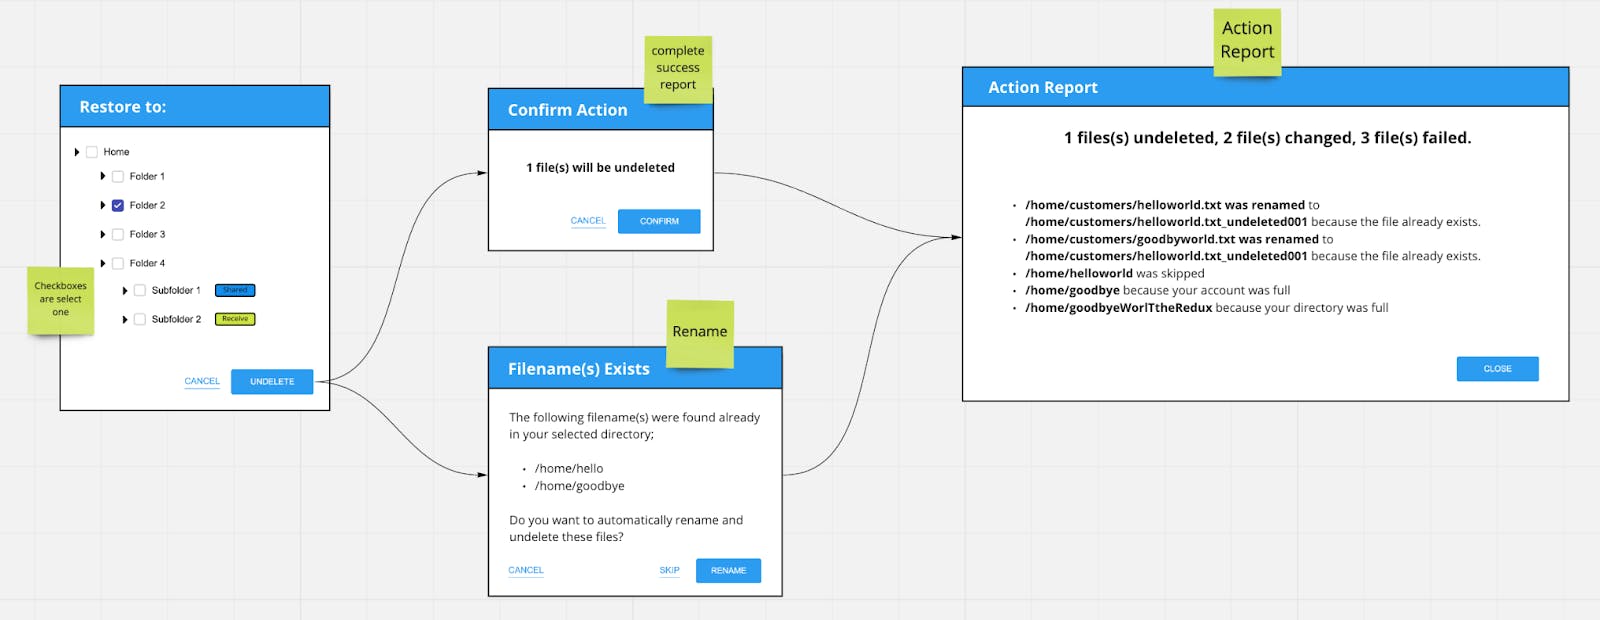
To address the issue, we made an update to change files and rename in order to keep them unique and avoid undeleting files also potentially deleting files in the same action. With the last major hurdle addressed; providing action reports for large restoration actions, and adding the ability to permanently delete files, got us across the finish line.
While we ended up with a few surprises, we’re happy with how the feature turned out, and we hope you feel the same way. If you haven’t tried it yet, you can go into your account, click the Trash Can icon in the lower-left corner and undelete a couple of files.
As always, let us know if you love, hate it, or feel we missed the mark at feedback@exavault.com.
Showcasing a few of the minor UI updates that provide a better experience in the web application. Read More
We all have sensitive or private documents that need to be shared, seen by certain eyes only, and approved. Read More


